Make the best photos even better
No matter which camera I use, I always record in RAW (plus JPG). But when shooting with a drone, RAW is especially valuable because of the benefits it provides during editing.
With the drone in the air, there’s often too much going on to fine-tune the exposure levels - I’m flying the aircraft, watching for danger, and framing images. It’s a lot, so I often choose Auto settings.
Shooting in JPG, the camera makes its best guess about how the image should appear, based on my settings or the lack thereof. Having made its decision, it compresses the image and discards a lot of data. Because RAW collects plenty of data without adjustment, it allows me more control of the images when I’m back at the computer doing post-production on Photoshop.
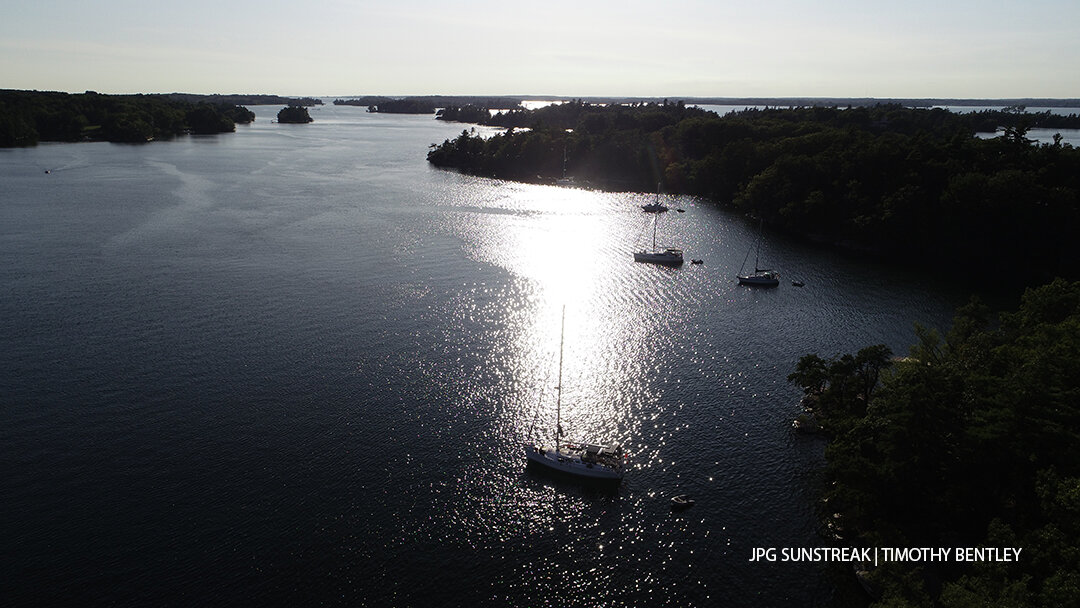
During the summer, I took a photo of Collier Island in late afternoon, with our boat in the foreground. In the JPG image, with very bright information, the camera has reduced the exposure, making it very dramatic. It’s almost a black and white photograph.
I like it a lot, but I also want to see if I can enhance the color - without losing the drama.
So I open the RAW image in the Camera Raw settings, and make some changes.
White balance
Typically, I’ll choose a white balance between As Shot or Auto, but sometimes I like to adjust Temperature and Tint. In this case, I find that As Shot depicts the blues in the water very accurately.
De-haze
I love this control, and go to it early in every mix. Because the drone can see for so many miles, dust or moisture often dull the distant parts of the image. Here, De-haze allows me to expose more of the detail in the sky, while providing better definition for the horizon.
Exposure and White
The bright sky and reflections automatically drove down the exposure, so I boost it a little, to make the trees more green, the way I saw them with the naked eye. At the same time, I reduce the glare significantly using White.
Highlights, Shadows, and Black
In order to control the brightness of the glare, I reduce the Highlights control to a minimum. Because the sun was behind the trees, most of what we see is in shadow, so I boost the detail using the Shadows and Black controls.
Texture, Clarity, and Vibrance
Drone shots typically contain a lot of detail that’s not always obvious, so it helps to boost Texture and Clarity a little. Vibrance increases the perception of colors.
Here are my final Camera Raw settings. We’ve got much more interesting color and some detail in the sky.
Cropping
When I finish with Camera Raw, I crop the left side of the photo. There’s a small powerboat there that I think distracts from the sailboats. Plus, there’s a little too much empty water on that side. BTW, I always de-select Delete Cropped Pixels, because who knows when I’ll change my mind and want those lovely pixels back?
Remove the red
I’m not happy about the unnatural red cast to the otherwise beautiful reflection of sun on water. It’s an artifact resulting from the brightness of the image plus my other manipulations, i.e. not a true tint. So I turn to Image, then Adjustments, then Selective Color. In both the Red and Magenta controls, I reduce the Magenta, and the red cast is gone.
Graduated filter
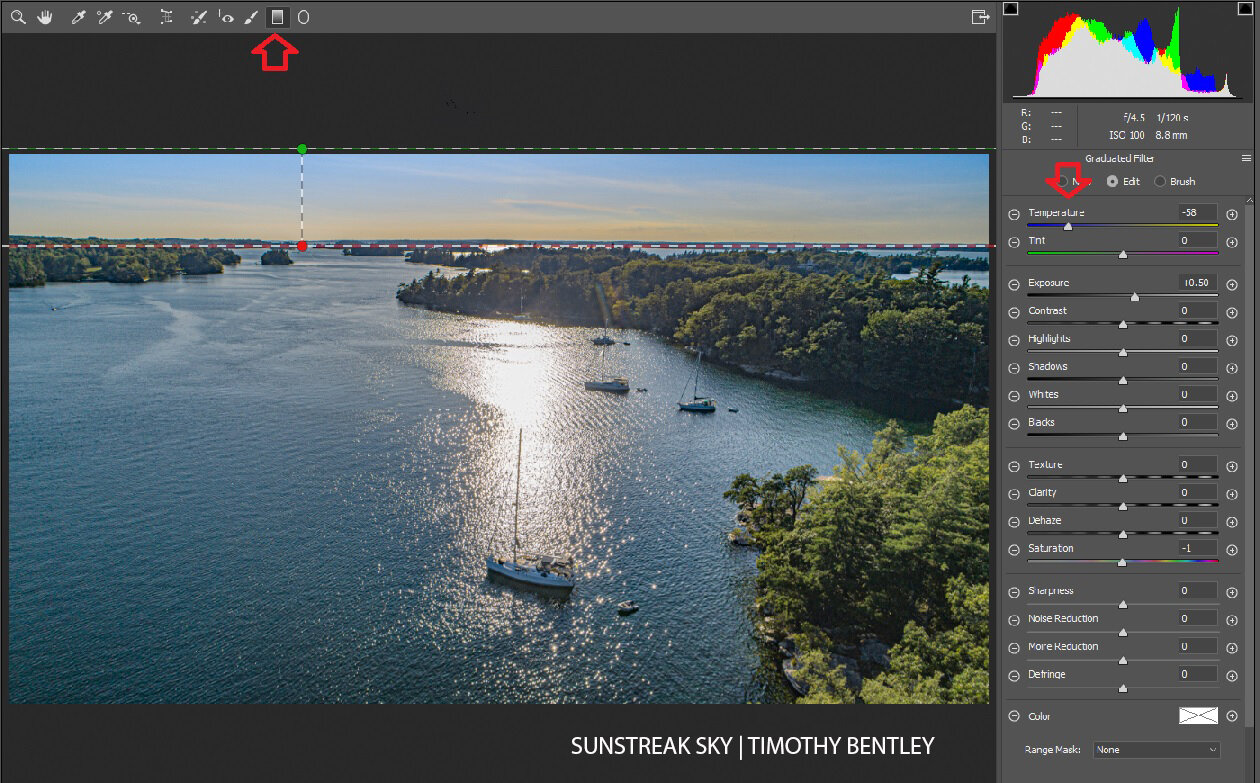
Now, when I look at the sky, I’m not satisfied with the lack of color, so I go back to Camera Raw. I pull down the graduated filter (see red arrow) from the top to the skyline. I reduce the Color Temperature a little to emphasize the blue, which I could see during the shoot with the naked eye. I try not to overdo it, because I don’t want a cartoonish image.
Uhoh. With most of the problems resolved, it has become more obvious that something has been bothering me all along. It’s that rainbow shaft of sunlight. The other shafts seem atmospheric, but this one doesn’t look natural.
So I copy the layer I’ve been working on, Rasterize it, and using the Spot Healing Brush Tool, I select Content Aware. I swipe down the shaft of light, and it’s gone.
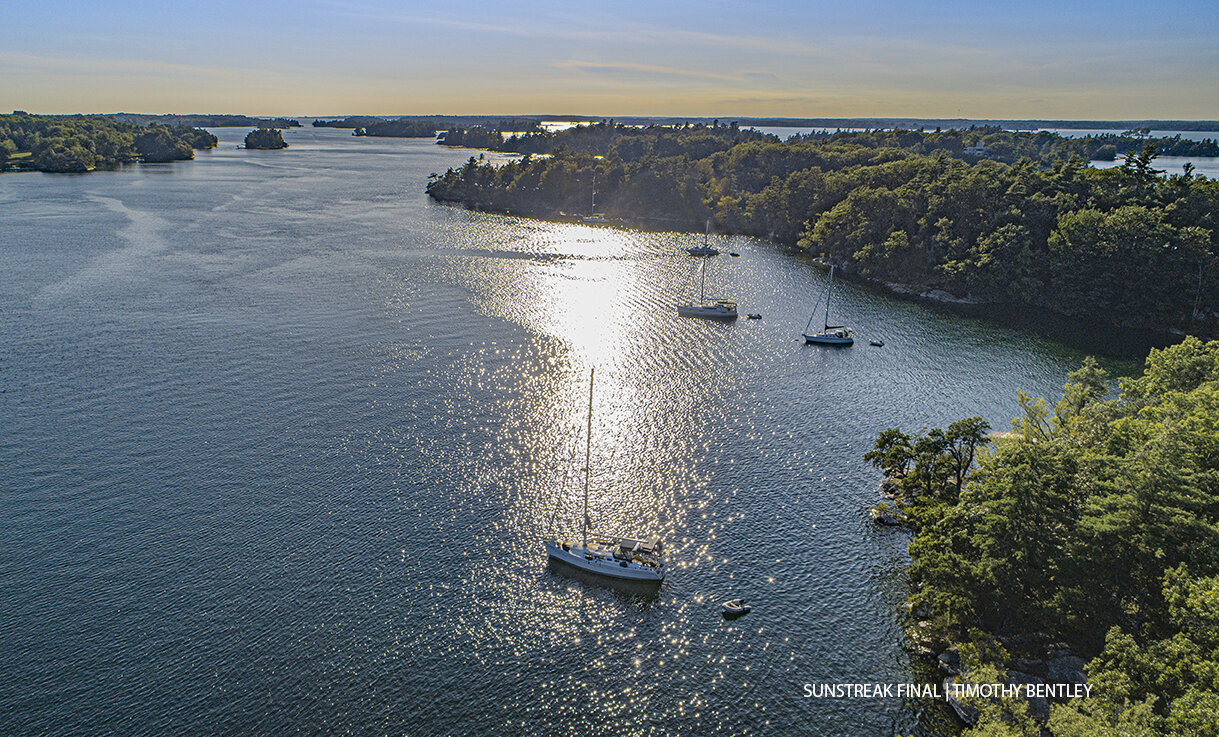
Here’s my final image. I’m happy about the way it speaks of tranquility at the end of the day.
Although I don’t use all these post-production tools on every photograph, this is a good sampling of my process. Sometimes I use other tools, for instance if the photo needs extra sharpening applied. But I should say that most of the time the drone provides a remarkably stable platform, resulting in nice crisp images.
As I see it, judicious use of a photo editor enables you to enhance what’s already in the image, allowing it to connect well with the viewer, without substantially changing it. In most cases, that’s my aim with photo editing.


